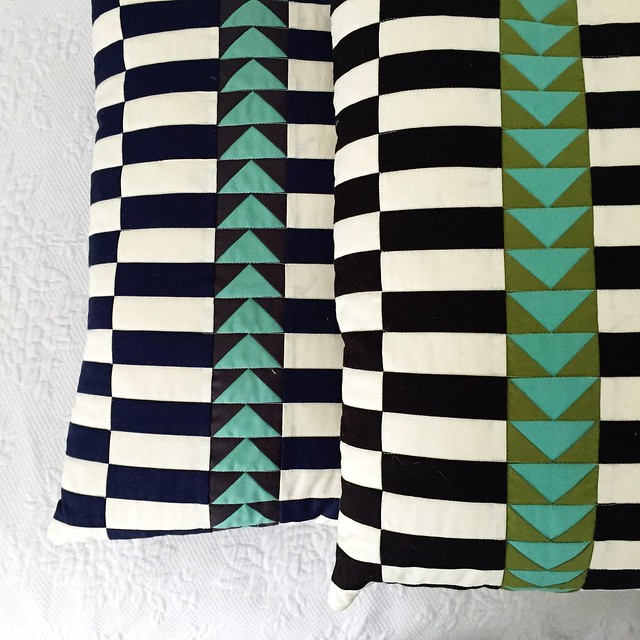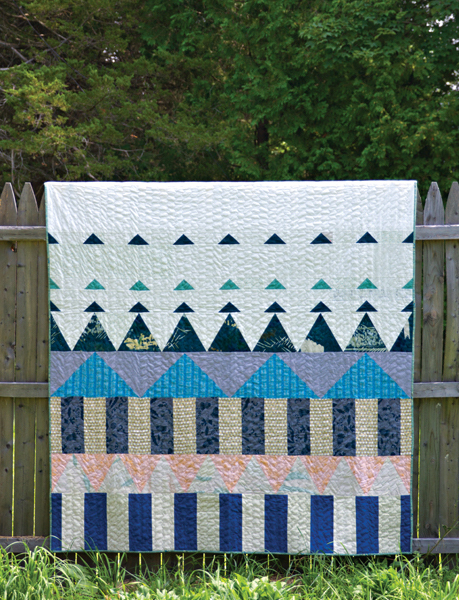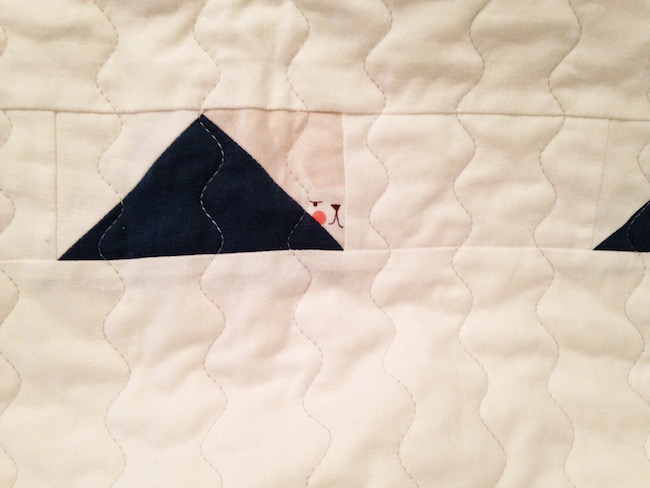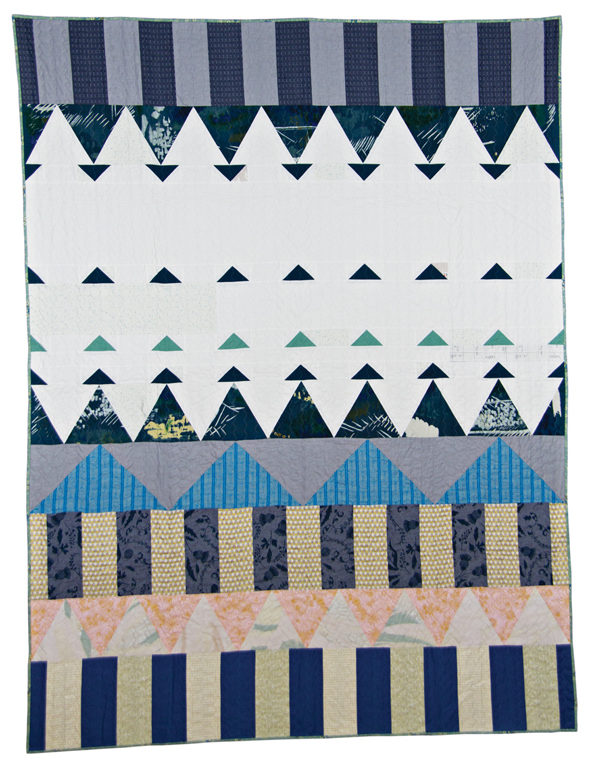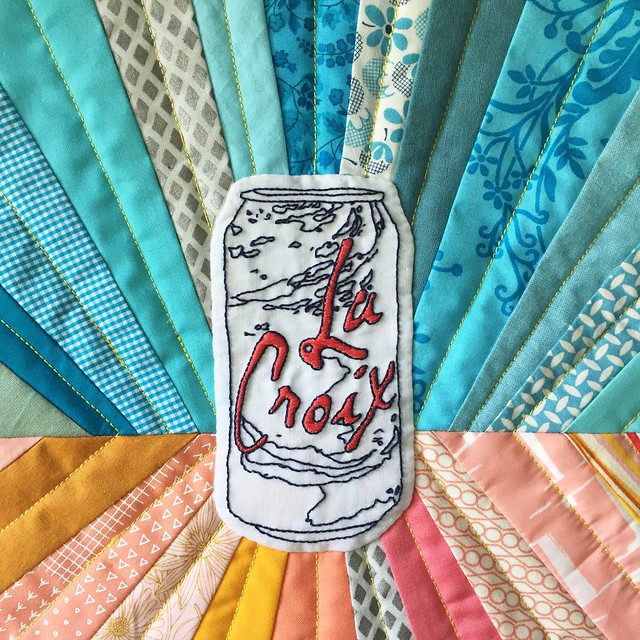
I made a LaCroix quilt… because it is really, truly the beverage of my dreams. (And, I was prompted by the Ann Arbor Modern Quilt Guild’s Foodie Challenge. We’re hanging our quilts in Zingermans!) I embroidered the LaCroix can, and I chose colors inspired by my two favorite flavors: pamplemousse and plain, aka pure.
And maybe you’re asking yourself, “Really? Really, this drink is so good that you will hand embroider a logo? You will give this corporation a piece of your handmade soul? Aren’t we just a step away from having a living room decorated in a Coca-Cola theme here? What is going on?”
I’ll explain.
You have to get beyond the package to love the package
I was introduced to LaCroix by my friend Kristin. (Kristin is the same person who taught me how to enjoy beer, but that is a different story.) It wasn’t a tricky introduction – she had cold cans in her fridge, offered me one, and I accepted. This was when I lived in Illinois, after having recently moved from the DC area. I had seen the cases of LaCroix at the grocery store, but I avoided them because they looked like something “diet”. The splashy paint and candy colors of the packages said, “aspartame here!”, “fake flavor flavor!”, and “Cheryl Tiegs 90s yogurt!” So when I tried my first LaCroix at Kristin’s house I was surprised to learn, “Oh, this is seltzer!”
Cold can experience
A cold can of LaCroix is entirely refreshing. It is fizzy and uplifting, physically and mentally. When you drink a cold can of LaCroix, you are having a cold can experience.
LaCroix is a special drink
…but it’s not. LaCroix just feels like having a special drink. In the doldrums at work? Have a LaCroix. Want the bubbly fresh feeling of kombucha but don’t want to spend 4 bucks? Have a LaCroix. Feel like having a beer but don’t want the calories and/or this is not a socially acceptable time to have a beer? Have a LaCroix. Want to savor the afternoon in your backyard? Have a LaCroix.
No joke, the first sip of a LaCroix and the first sip of a cocktail give me the same deep breath feeling. I know that’s all in my head, but isn’t half of having a cocktail the state of mind? And, equally good, LaCroix pairs well with other people drinking. At a party but not imbibing? LaCroix makes you feel like you’re in on it too.

LaCroix is not fancy
Despite what hashtag socality type instagram photos might have you believe, LaCroix is not fancy. It is from Wisconsin! How not fancy is that?! I love it, so much, that this special beverage is Midwestern. It comes in 12 packs (which go on sale at the grocery) and it costs about 40 cents a can. You might think that its 90s style labels are too-cool-for-school hipster, but LaCroix is just out there being genuine. I’m sure the label is part of LaCroix’s rise in popularity and of what makes LaCroix more than just seltzer. It confuses people, like it first confused me. We have come to expect a gimmick in our boughten beverages, and we are surprised when that can contains honest, flavored sparkling water.
Isn’t it just seltzer?
I grew up in New Jersey, and a couple years ago when we drove home for the Christmas, I left a can of LaCroix in my mom’s garage fridge. When I was back visiting in the summer the can was still there. The can was so weird and foreignly Midwestern that nobody wanted to touch it. Now, what you may or may not know is that New Jersey is a seltzer-drinking place. I grew up drinking seltzer – it was Vintage or Foodtown generic brand and it was in a bottle. So, even though my mom’s fridge saw plenty of other sparkling water pass through it, the LaCroix remained untouched, because LaCroix is just a little different, even if it’s not.
New Jersey friends feel the same way about Vintage that I feel about LaCroix. I try to convince them about LaCroix and they give me side eye, even when I bring up the glory of pamplemousse. I got one friend to do a side-by-side lemon-lime taste test, and the verdict was that LaCroix was more subtle. This might be why I like it and it why she prefers the other.
Her: Yeah, but you have to love Vintage for the real New Jersey thing.
Me: (pamplemousse look of skepticism)
Her: OK, but the real New Jersey Jewish thing?
OK, she’s right there. The cultural seltzer drinking I grew up with knows nothing about LaCroix, and I am not going to mess with those traditions. It would be very not Midwestern of me to try to insert my Midwestern influence over other people. If I were still a New Jerseyan, I would be distrustful of LaCroix too. Because in New Jesey at Wegmans (grocery), they sell LaCroix on the fancy organic stuff aisle. What is that about? We all know LaCroix is not fancy. Distrust.
Pamplemousse
Why is the grapefruit flavor of LaCroix in French? We don’t know, but we like it. Pamplemousse is delicious, my favorite, and I love it forever. Most of the LaCroix flavors are great. Some are terrible. And Coconut leaves us highly divided. Personally, I stick with the flavors that come in the standard can shape. I am really not so sure about the LaCroix Cúrate. I feel like those skinny cans are trying to sell me something because I’m a woman, like the Virginia Slims of sparkling water. Just because you’re my favorite beverage doesn’t mean I’m not giving you the critical eye.
Corporate poetry
In getting ready to write this post, I did a little research about LaCroix and its parent company, National Beverage. I mostly wanted to make sure that they weren’t doing evil things that I didn’t know about. They seem like a pretty regular company. However, they have an amazing, poetic annual report. (NASDAQ “FIZZ” btw, so cute.) Some highlights:
“NATURALLY CREATIVE, DYNAMICALLY
INNOVATIVE AND . . . MINDSET!”
“Just believe . . . if we, who produce for ‘stomachs’, are conscious enough while conscience-guided to use our billboards and factories to give wholesome choices . . . isn’t that our patriotic purpose? I know so . . .”
If you love LaCroix, I would recommend reading the whole thing. More than that, I would recommend reading the whole thing out loud, dramatically, to other people who love LaCroix. You won’t be disappointed.

Where does this leave us?
At the end of this post I find myself saying, “You had a lot to say about that.” I am a little judgey of self. There is so much going on in our world, big and little, that I do feel a little silly devoting time and energy to a fizzy drink. But, maybe that’s the root of it. LaCroix is a beautiful escapist beverage. I think that’s why we love it. Crack open a can and just for a minute, you’re on vacation, the world is sane, and it’s all sunshine and sprinklers and rainbows.