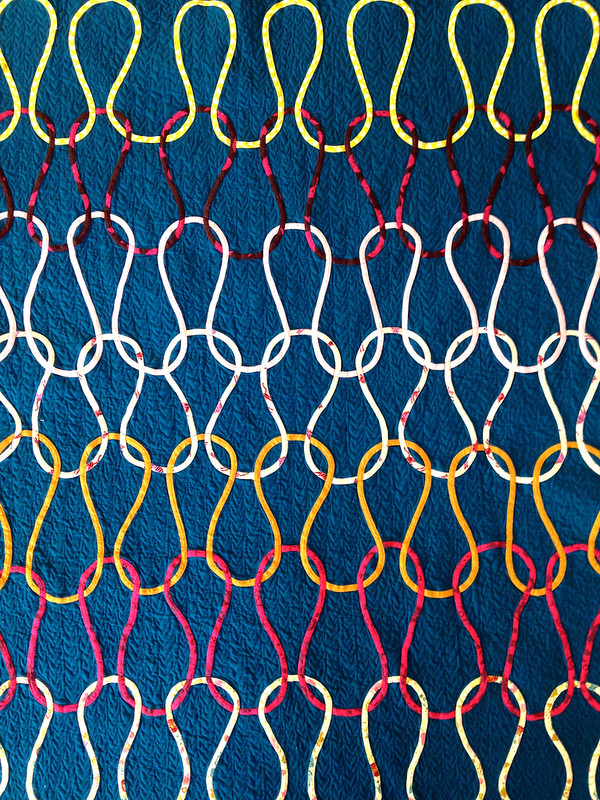
knit stitch quilt in progress

While working on my knit stitch quilt, I figured out one way of doing bias applique that worked for me. This is how it went.

bias bars

First part: Bias tape

I did a small amount of research and found that the people who do crazy small bias applique – the Celtic knot people – use bias bars to make bias tape instead of a bias tape maker. What is the difference? You know how when you make bias tape with a bias tape maker, the creases can relax and your raw edges can get hard to deal with/visible/weird? With bias bars, you sew the bias tape into a tube (wrong sides facing – you’re not turning that business). Then, you put the bar into the tube and use it to press the tube flat. The seam goes on the back and no edges wiggle out anywhere.

pressing the loop

Second part: Getting the bias tape on the foundation

Debbie gave me the best two cents about bias applique. I had wanted to make a word using bias, and my effort kind of looked like hell. She said, You’ll want smaller tape, and you’ll need to press the heck out out it. These two sage bits of wisdom helped me get off on the right foot when laying out the knit stitch quilt.

marking the knit rows

I knew I wanted each knit stitch row to be about 10 inches tall. I marked the height with masking tape on my foundation fabric. Then, I used the iron to press my bias tape into the knit loops. After I pressed the whole row of loops, I used applique glue to secure the loops to the fabric. (Actually, for the first row I used pins, but I pricked myself so many times that I went looking for other options.) I think applique glue might just be school glue with a nicer cap. The cap on the glue I used had a long, thin tube so the glue came our slowly and I could apply it accurately. Lynn has since told me to watch out for rust in the metal caps!

laying out the next row

When gluing the loops, I left two unglued spaces on each loop. This is where the next row of bias tape gets “knit” in. Because each row is locked into the row above it, I always shaped and glued the next row before sewing the current one. To do the actual “knitting”, I ran a bias strip under the loop below it, through the unglued spaces.

pulling the loop through

Then I pulled up each loop in line with the stitch below it, and pressed it in place. For each row I marked the desired height with masking tape, as a guide.

stitching the bias

Third part: Stitching

Once I had a row secured and the row above it set, I stitched the row. I found that the blanket stitch worked best for me. I like the way it catches the applique without flattening it down or making a hard straight line. I also found it easier to control and more forgiving than a straight stitch. I stitched on both sides of the bias tape, following the curves and stopping and breaking the thread where the “yarns” intersected. I used thread to match the bias tape.

I repeated this process until all rows were stitched down. ta-da!

{ Comments on this entry are closed }

Kona giveaway winner

by Dorie on November 5, 2014

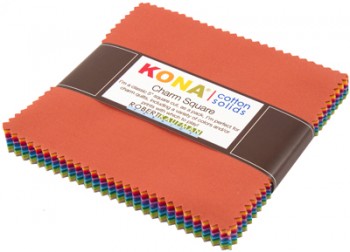
The winner of the Kona new colors charm pack is Karen, whose favorite Kona color is,

“All the shades of purple!!”

Karen, I’ll get in touch, and I hope you love all the new purples!

Thanks so much to Robert Kaufman for sponsoring this giveaway, and for putting on a fabulous quilty celebration!

{ Comments on this entry are closed }

Rock Jetties quilt

I am super excited to share this quilt with you! I got to work with the wonderful people at Robert Kaufman to make a new quilt using the amazing palette that is Kona cottons. Why? Because Kona is turning 30 and they’re having a party! They want to give you a present!

Quilt first, present later.

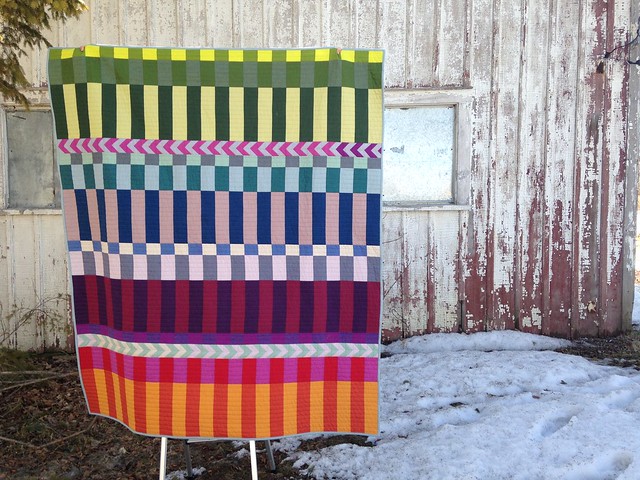
When I sat down to make Rock Jetties, I knew I wanted to make a row quilt. I had been having a lot of fun playing with this style in both my Somewhat Herringbone quilt and my Fresh Pack quilt. I love blue and gray and I usually head to these colors first. For this quilt, where I could use ANY of the many Kona colors, I wanted to ratchet up the intensity a little. I went to tide pools for my inspiration, and thought of the shore where I grew up and the beaches on a recent trip to Israel. The ocean’s darker deeper colors are brightened up with seaweed and reflections of intense blue skies. I wanted to get a little bit of all of that in this quilt. The Kona colors I used are silver, iron, bonsai, cactus, aloe, ice frappe, celestial, prussian, indigo, aqua, azure, and graphite.

My quilt was quilted by the amazing Angela Walters, which is giving me gah-gah eyes to this day. It is unbelievably good. The quilt has big chunks of geometric color, and I love how the quilting enhances the organization of the shapes and tells a more detailed story.

The pattern for Rock Jetties is available free on the Robert Kaufman website, right here.

Kona 2014 colors

Now the present. You might know that Kona just came out with new colors, which brings the total number of Kona cottons up to 303. (Woah.) We’re giving away a charm pack of the new colors – just leave a comment on this post with your favorite Kona color to be entered to win! Entry is only open for 24 hours and will close tomorrow at 10:00 AM US eastern time.

I am just the third stop on a 30 stop blog tour of all the amazing quilts that Robert Kaufman and some seriously talented people have created for the Kona celebration. I particularly love the quilts by Carrie Strine and Lady Harvatine. And, I’m pretty sure those two quilts love each other too. They are page mates in the 30th Anniversary look book!

Follow the whole tour! Much more to see!

Week 1:

Saturday, November 1st: Johanna Masko

Sunday, November 2nd: Alyssa of Aria Lane

Monday, November 3rd: Dorie of Tumblingblocks

Tuesday, November 4th: Megan of Canoe Ridge Creations

Wednesday, November 5th: Daniela of Cozy Quilt Designs

Thursday, November 6th: Faith of Fresh Lemons Quilts

Friday, November 7th: Anita Grossman Solomon

Saturday, November 8th: Debbie of Esch House Quilts

Week 2:

Sunday, November 9th: Alex of Teaginny

Monday, November 10th: Darlene Zimmerman

Tuesday, November 11th: Nichole Ramirez

Wednesday, November 12th: Rita Hodge of Red Pepper Quilts

Thursday, November 13th: Lee of Freshly Pieced

Friday, November 14th: Julie of Jaybird Quilts

Saturday, November 15th: Latifah of The Quilt Engineer

Week 3:

Sunday. November 16th: Elizabeth Hartman

Monday, November 17th: Erica of Kitchen Table Quilting

Tuesday, November 18th: Karrie of Freckled Whimsy

Wednesday, November 19th: Valori Wells

Thursday, November 20th: Marilyn of Quilt Moments

Friday, November 21st: Cortney Heimerl

Saturday, November 22nd: Shayla and Kristy of Sassafras Lane Designs

Week 4:

Sunday, November 23rd: Shea of Empty Bobbin Sewing

Monday, November 24th: Carrie Strine

Tuesday, November 25th: Rachel of Stitched in Color

Wednesday, November 26th: Liz of Lady Harvatine

Saturday, November 29th: Carolyn Friedlander

Week 5:

Sunday, November 30th: Elizabeth of Don’t Call Me Betsy

Monday, December 1st: Emily of Carolina Patchworks

Tuesday, December 2nd: Ken Kaufman

Wednesday, December 3rd: Grand Finale!

{ Comments on this entry are closed }

knit stitch bias applique quilt

by Dorie on October 29, 2014

knit stitch quilt

Helloooo. I’ve got actual things to say about this project I just finished up. ACTUAL THINGS.

I tried something new here—bias applique. I don’t think I had any idea what it was until I saw Debbie’s beautiful quilts when I started going to guild a couple years ago. I mean, I guess I knew that bias applique was how you could make a flower stem, but I didn’t think about it as a method for design. Applique, and particularly bias applique, just hadn’t been been something I’d seen much in my sewing circles. And by sewing circles, I mean the instagram feeds I follow.

Since then, bias applique has lingered on my list of things to try one day. One day…

knit stitch quilt texture

… like now-ish 2014! I think it’s so completely awesome that the Modern Quilt Guild has a bias applique challenge category for QuiltCon! I’m going to go ahead and say that most modern quilters have not done bias applique. How many even had it on the radar? I don’t know, but more people do now. And more people will be trying to learn this new quilt technique, and watching each others’ efforts. That is super. It’s a challenge that is actually challenging!

bias applique quilt close up

This project! This project is all about quilting loving knitting, or people who love to quilt and also love to knit. Or about how if you give a knitter a long piece of tape and ask her to make a quilt, she might knit you a quilt instead. The knit stitch itself is such an interesting shape—it overlaps and it hooks under. It looks like nothing, but can make a fabric. Lynn and I had a conversation recently about the relationship of quilting and knitting. There is so much there. Both knitting and quilting are about construction, but they look at fabric, pattern, and shape differently. Looking at those places is bound to yield some interesting cross-inspiration. Lets do more of it!

This knit stitch, with its curves and interlocking lines, seemed like a good, simple-enough, yet interesting, place to learn bias applique. I need a more process-y post with the details, but the overall idea is, I did learn it. It may have been infuriating at times, but it was interesting at every step of the way.

quilt helper

The base color is Kona celestial. Each bias strip is applied right to the base. I “knit” the strips by weaving them in and out with my hands. I thought about getting giant knitting needles, or pvc pipes, and I tried arm knitting, but really all that wasn’t necessary.

quilt back texture

The blue part of the quilt, behind the loops, is free motion quilted using a ziggy stockinette-like stitch. That’s some knitspiration from Lynn – that along with not being a chicken in my quilting choices! I had thought about just wiggly straight line quilting over the whole thing because I was intimidated about maneuvering in all those spaces. Plus, how long would that take? So glad I told myself to buck up and quilt it right. I love the texture of the result.

{ Comments on this entry are closed }

fresh pack quilt pattern

by Dorie on May 29, 2014

fresh pack quilt

Thank you, thank you for the love on my Fresh Pack quilt. That quilt surprised me. For all my hesitation and process churning, it is a really good quilt. And, yay – I made a pattern for it! But first, let’s talk about about inspiration.

Fresh pack was a quilt born out of a relationship with a knitting project. I have long loved the Inspira Cowl (by graphica on ravelry). I have wanted one and wanted to make one and watch its colors fall from my fingers as I knit. I started an inspira a couple years ago – the fingering version. I get it out every couple months and work on it until the crazy neck and hand pain of working corrugated rib on small needles makes me cry and shove it in a corner. But who can stay away? I wanted to do the thing with the color and the variation and the baltic braid. I took the rows and the braids and I turned them into stripes and flying geese. And then I enjoyed the color. I found that a pack of good solids is much like noro yarn in fabric form.

I shared my quilt and my pattern idea with Marcy (graphica) because I was so inspired by her cowl, and she had some wonderfully creative ideas for how to interpret it:

People will have fun with this. I can imagine some quilters achieving a heathery effect w/ tiny floral prints, or an edgy urban effect w/ the occasional large prints peaking among weathered solids; or tonal Indian blanket effect…

The fresh pack quilt pattern is free like Inspira is free. With sooo many solids out there now (and solid collections?!), there are just endless color possibilities and I kinda want to see them all. Yes? OK! The pattern is available on Craftsy. It has been tested by a wonderful group of testers. (Seriously, this pattern is so much better having others’ points of view.) Thank you Stephanie, Maria, Ronit, Kate, Emily, and Amy!

Make one and let me see!

{ Comments on this entry are closed }

somewhat herringbone quilt

by Dorie on May 6, 2014

somewhat herringbone quilt

At the end of this quilt, what I have to say is, Yes, that is the quilt I wanted to make! This quilt was gradual. I knew the feeling of the thing I wanted to get to, but I wasn’t sure at the beginning how I was going to get there. Wait, hold the phone – is that what improv is supposed to be? Mmm, I think so.

The very beginning of this quilt was a play with leftover whites. I thought I’d do a whole chevron quilt with all the different whites I had left from other projects. I was inspired by Natalie & co’s do good stitches quilt, and I used the this tutorial from six white horses as a jumping off point. It seemed like a good idea – I had different white and off-white quilting cottons, some white on white prints, some white linen – but it got boring quickly. I still think that would have been a good idea, but I would have needed more variety in the whites (and more patience).

Not really enjoying the white-on-white-on-white process, I decided to add some color. The mustard and aqua are pulled from the colors Meg picked for our first Kids Clothes Week web site season. I was deep into development and they were beautiful. And then gray, because I love gray.

I don’t know about you, but I have a hard time trying to make things look random. I over-think the randomness, and I didn’t want to do that in this project. So, my piecing process went like this: Cut up a bunch of strips of fabrics in varying widths and about the same length. Safety pin the strips in pairs. Put them all in a big sack. When ready to sew, pull a pair from the sack and sew it to the chevron row. I mostly stuck to this, but sometimes the next fabric was too wrong and I just couldn’t. My prerogative. (Points if you’re singing Bobby Brown now. More points if you have done a dance routine to this song.)

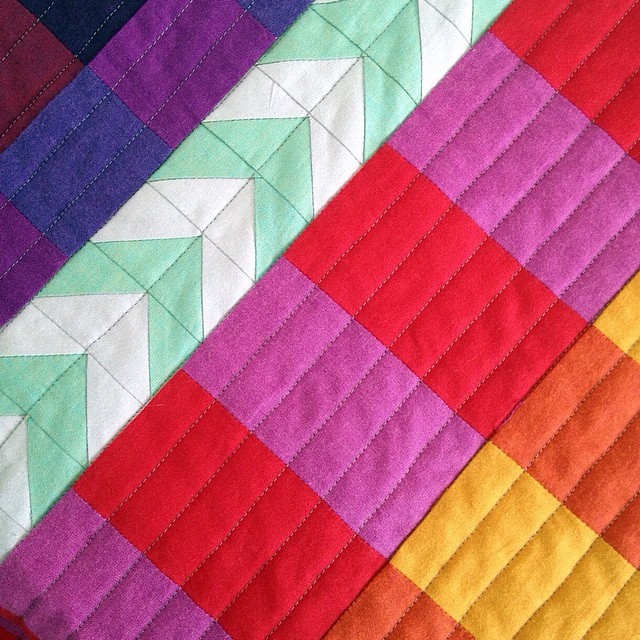
I finished assembling the quilt top at winter retreat with the Ann Arbor MQG, the perfect place to do such a thing. I was glad to be surrounded by quilters with good feedback! I knew I wanted the rows to have white space, but not too much white space, because the quilt is really about the texture of the herringbone. I messed around with the spacing and row order until I was happy with it.

And last, but in this case actually not least, the quilting. This might be the first time I was really excited about how the quilting was, for real, making the quilt even better. I quilted the quilt in zig-zag lines, loosely following the herringbone pattern. Like the strips, the space between quilting lines is varied.

Happy about it.

{ Comments on this entry are closed }

Maybe you get this feeling: when you have a new pack of markers, or crayons, or pencils, and they’re all just so perfect-pointy-beautiful and ordered that it’s hard to break into them and use them as tools. That’s how I felt about this fabric stack.

It was a bundle of 25 different peppered cottons, similar to oakshott or shot cottons, but in a quilting weight, and really noticeable soft. I bought them because I’d long admired others’ stacks, and when Brenda shared that the manufacturer, studioE, was having a quilt contest, I thought I had just the thing.

But then my idea didn’t work. It just didn’t. And all the fabric looked somehow purple. So, I put it all in color order and put it in a pile next to my sewing machine to just sit for some time. While I was giving the fabric the cold shoulder, I realized that what I really liked best about those gorgeous fabrics was the way they looked when ordered up next to each other. So why not keep the order instead or trying to force the color idea I had planned?

That’s what I did. And there is SO MUCH color. I mostly kept the order of my pile, but I injected a couple lines of flying geese in out-of-order colors, just to keep things interesting. It brightens up my corner.

{ Comments on this entry are closed }

eventual tulips quilt

by Dorie on March 3, 2014

eventual tulips quilt

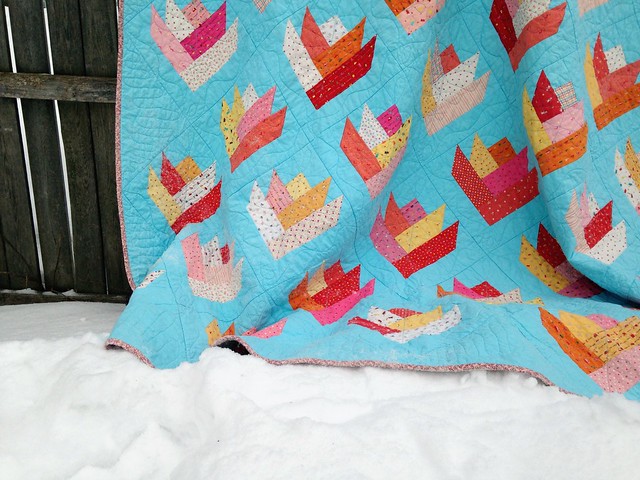
A quilt without a reason can take a long time. I started the quilt “just because” back in 2009. I wanted to try working with a jelly roll, and I really liked the sweet little minny muu prints. On a lunch hour walk to Barnes and Noble (so picturesque, under the interstate), I found the tulips pattern in Pam and Nicky Lintott’s Jelly Roll Quilts and was smitten.

eventual tulips quilt

Since then I’ve worked on this quilt in bursts. I did some blocks, and put it aside. I cut all the pieces, and put it aside. I sewed all the remaining blocks, and put it aside. I cut the setting squares at my first A2MQG meeting, and put it aside, I sewed the strips together on the floor my new house, and put it aside, I pieced a back, and put it aside. And I finally decided to work on my free motion quilting and quilted the whole thing. Then promptly bound it.

So now it’s a quilt. I like it. It’s very cheery, so much so that I almost want to tell it, “Enough already! I get it – spring is coming, winter is not forever and you are tulips. Your symbolism is somehow a little aggravating.” Sigh. (I know I’m not the only one having warm weather fantasies.)

I don’t have a definite place for it. It’s a double, and I was going to put it on the guest bed, but the guest bed is now a twin. If it doesn’t look ridiculous I’ll do it anyway.

{ Comments on this entry are closed }

sew together bag

by Dorie on January 30, 2014

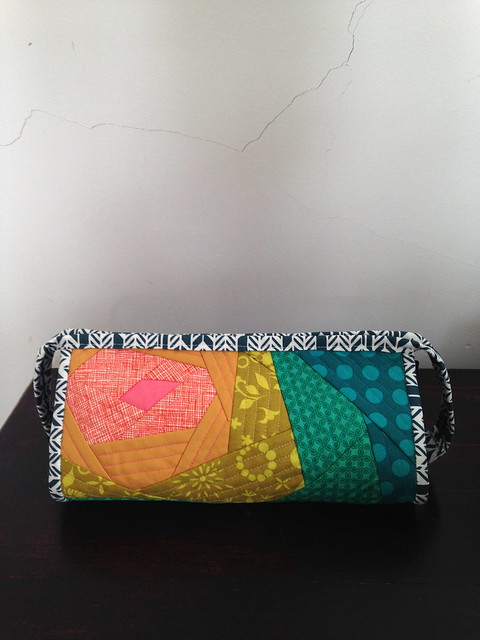
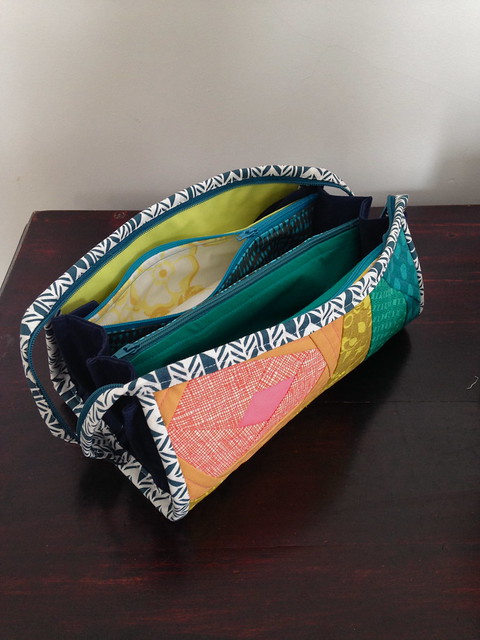
Sometime before Christmas I was seeing a lot of the Sew Together bag in my Instagram feed. It looked awesome – lots of pockets for stuff and ample opportunity for playing with fabric, but you know, everything that made it awesome also made it look a leeetle complicated. I gave it a go anyway.

The first one I made was for my sister. As I worked through the steps, pattern intimidation turned to that happy puzzle doing feeling.

Not that the instructions were puzzling. They weren’t, They were clear and even said things like, “you will need to sort of smash the pockets flat.” That is the kind of honesty I appreciate in pattern writing! Thank you for letting me know when it’s not pretty.

It comes together well, is fun to make, and in the end, a master zipper zips all the little zippers. This one went to Anna, my secret santa partner! I used some of Alison Glass’ sunprints fabric, and I thought about using all sunprint for the rainbow, but decided it was a little more fun to mix it up.

And in other news, it’s Kids Clothes Week. My kid is big, but I keep thinking I’ll do some nephew pants. I’m still building away at the site, though!

{ Comments on this entry are closed }
snowseeking shellseeker

by Dorie on January 8, 2014

This sweater is the best kind of warm—toasty and snuggly without being too hot. Wool sweaters are my most essential tool for successfully working out of a drafty house during a Michigan winter, and I am really pleased to be adding this one to my toolkit. I have worn it for much of the polar inversion!

The pattern is Shellseeker, which is styled to be like your best slouchy, at-the-beach-in-the-evening pullover. It has a sweatshirt-style pouch pocket! Mmm…cozy. I think the pattern yarn is a cotton-wool blend, but mine is all wool (Stonehedge Shepherd’s Wool Worsted). Less beachy, but definitely what I need now. I’m really happy with both the pattern and the yarn.

It feels like it took forever to knit (I started in March), but that’s only because I put it down for most of the summer. It wasn’t difficult. The stripes kept it interesting and the stockinette made for good TV knitting.

Stay warm!

{ Comments on this entry are closed }